Hello guys! Since many of you are eager to know of how to edit your photo to look more fabulous, I encourage myself to make this blog post for you. Instagram has become a media of portfolio for some people in doing commercial business, especially for endorsement. The better the quality of your photos, more likes are coming and more users see your portfolio. Thus, a good looking photos are necessary.

My Instagram Feed @jessica_sisy
There are many tools to edit your photos, such as Adobe Photoshop, Adobe Lightroom, PicsArt, Snapseed, VSCO, Face Tune, etc. You can download the photo editor apps via Play Store. Some of them are free and you can directly use it to edit your photo. I suggest you should download VSCO and Snapseed because they are easy to use, simpler, and applicable for newbie. For Adobe Photoshop and Lightroom, they are more complicated, but I love them! Let’s start with the simplest one : VSCO!

VSCO is the simplest photo editing app in your smartphone. It’s easy to use, offers you a range of free filters, and manual adjustment. Filters are necessary to build your Instagram’s feed. Perhaps, most of you have realized that building a theme on your Instagram’s feed is similar to building a portfolio/image of yourself.

The first step of using VSCO is choosing your own preset (filter). There are more than 86 presets available. Fifteen are free in app and the rest are available for purchase. Honestly, I rarely use VSCO filter in editing my photos since I like the manual adjustment more than just using a single tap of choosing a filter. However, if you are a newbie, than I encourage you to use presets to ease the photo editing.

Flatlay for Endorsement
PRESETS / FILTERS
I will share you some of my favorite presets. I like the bright tone and film-like tone, so I choose these presets to share with you.
The Analog/Aesthetics Collection (A1-A6)
The Aesthetics Series is one of the most popular presets in VSCO. Many bloggers use this filter since it will give slight fading and higher contrast. The result will look natural, thus it is suitable for food photography, interior, or OOTD photos. The most favorite filter from Aesthetic Collection is A6. Sometimes, I use A5 and A6. The latter filter (A6) will make your photos looked warmer, more vintage, and brownish tone. I suggest you to do some manual adjustments after you do any kind of filter. Tips: adjusting about 75% from the max value to get your image looks good, but not over-edited.


Hypebeast x VSCO (HB1, HB2)
This preset is my favorite since it will give more contrast tone, cooler tint, but darker than Aesthetic preset. Both HB1 and HB2 are free. More adjustment on the Temperature or Saturation to make your photo become warmer. Some people dislike bluish tint on their photos.

F Series: Mellow / Fade (F1-F3)
The F series will give you elegant result. That’s why I like this preset. F1, F2, and F3 excel at beautiful skin tones and quiet everyday moments. F2 is available free in your VSCO app.

C Series: Vibrant Classic (C1-C3)
This preset is super vibrant or super chromatic. The C1 to C3 are timeless and good for photography. Sometimes, I use this preset for darker-cool photos. Too much bluish tint on your photo will ruin the result. This preset could help your photo looked warmer and cheerful.

Varying in tones, sentiment, and subject matter, the gorgeous moments below (in the next section) are laudable examples of photos recently shared to VSCO Grid and processed using the presets in The Minimalist Collection.
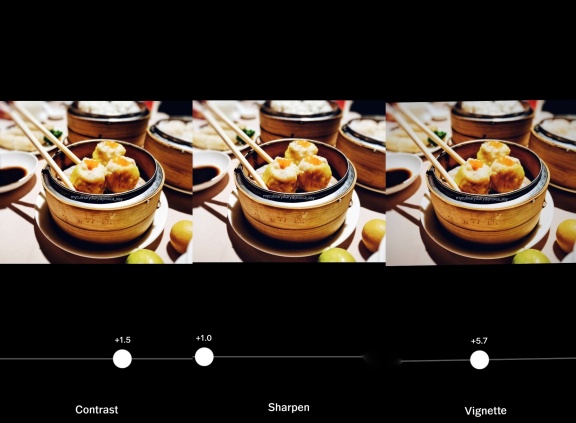
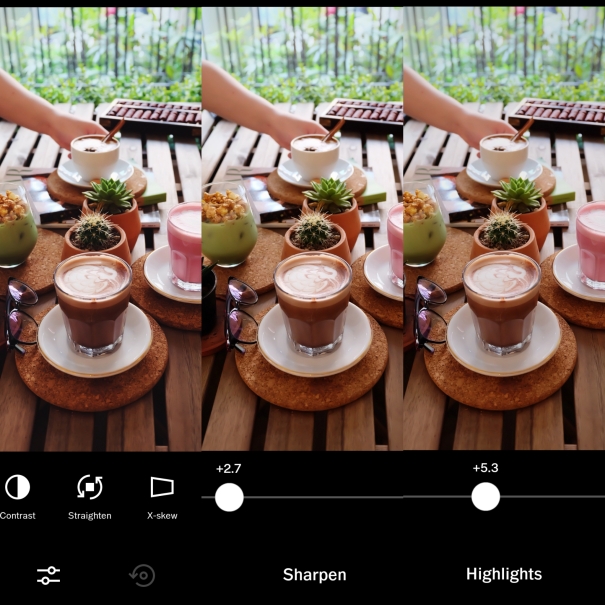
MANUAL ADJUSTMENT
In some cases, you need to do manual adjustment tools (besides using filter) to correct the brightness, finding the best tune on your photos, sharpening, adjusting the Temperature, and many more. These are some more tips for the essential manual tweaks:


For better image, use Perspective and Straighten, after you do Crop the picture. Try to focus on your image. Capture the best thing or moment and make it in detail. Clarity can be used to make your image clearer, emphasizing the details. You can also choose Sharpen for your final touch.

I always use Exposure (between 0 to 0.7) to make my image brighter without losing any details. Then, use Contrast if it’s needed to reduce or increase the contrast between light and dark portions of an image. Too much contrast is not good.
After that, you can adjust the Temperature, Tint, or Skin tone to give your image cooler or warmer tint. This will make your image more vintage or cooler.
Shadow Save is needed if you want to brighten a dark photo, while Highlight Save is needed to soften the bright areas of your image.
Adjust the Grain if you want to add a bit of film-style coarseness to an image. You have to find a good balance to keep the details of your image and still make it to look amazing!
Okay, I hope this simple tutorial will help you to edit your photo. It does not matter if your photos are not captured by a DSLR or mirrorless camera. Photos captured by your phone camera are also amazing! Try to edit your photo and voila! It will look like it was captured by a real camera :p


More images on my Instagram @jessica_sisy
.
.
.
ENJOY YOUR DAY ♥
Contact for endorsement and food tasting via my email
Let’s eat! More food posts on my Instagram account (IG posts and IG story)
You can visit my page on Pergikuliner :
You can see my reviews on Zomato and Foody.id
